Package your tool
The packaging procedure is now the same, independent if you migrate your tool or if you started from scratch. Make sure you have the project locally on you device (see step 0 below).
- Clone your project
0. Open the start page of your modelling tool project- Click on
Clone - Choose
Visual Studio Code (HTTPS) - Confirm that you want to open the link
- Choose your local folder, where you want to save the project
- Click on
 Visualisation of the steps needed to clone your modelling tool to your device, using Visual Studio Code
- Configure the packaging
- Hint: Additional information about the configuration can be found in your project under
SRC\00-BUILD-SRC\README-tool_specific - Open your local project in Visual Studio Code. The window should look similar to the figure below
- Hint: Additional information about the configuration can be found in your project under
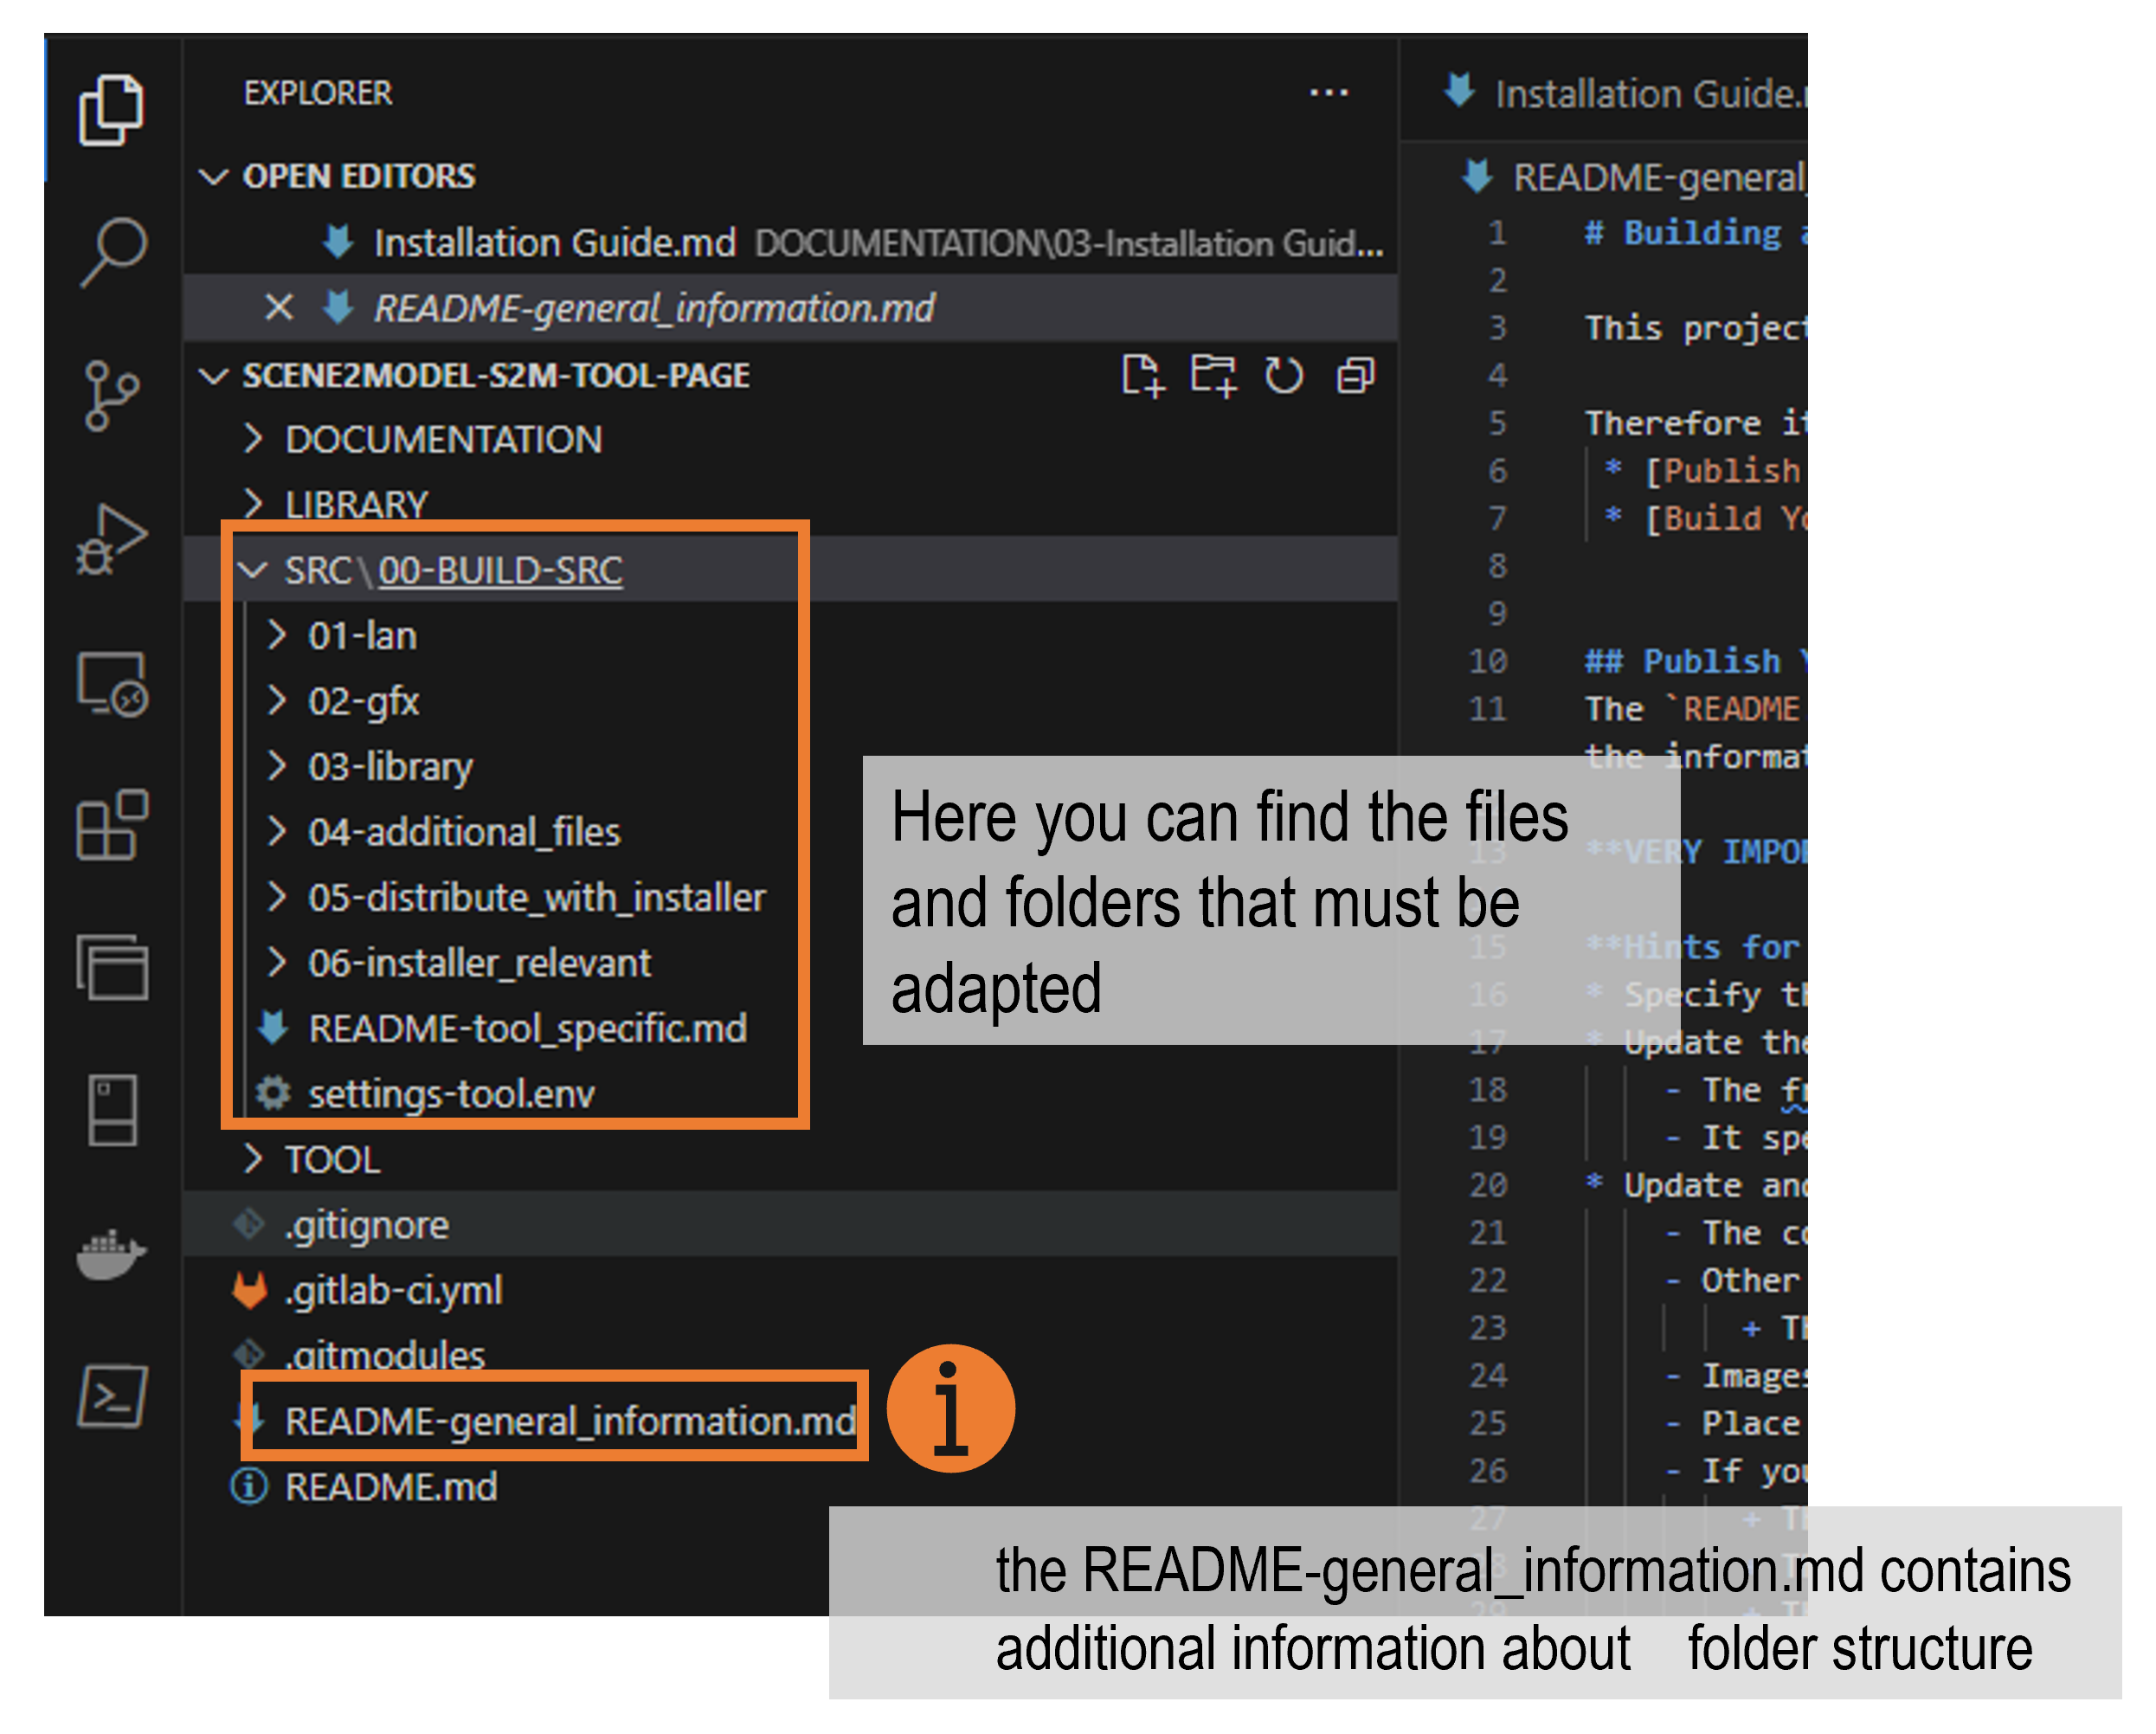 Visual Studio Code interface of the local project, with important parts highlighted
- Open
/SRC/00-BUILD-SRC/settings-tool.envand provide your information- The parameters are described in the attached comments
- If no GUIDs are provided for the Windows installer, they are created automatically and saved in your project under
SRC\00-BUILD-SRC\06-installer_relevant\tool_guids.env
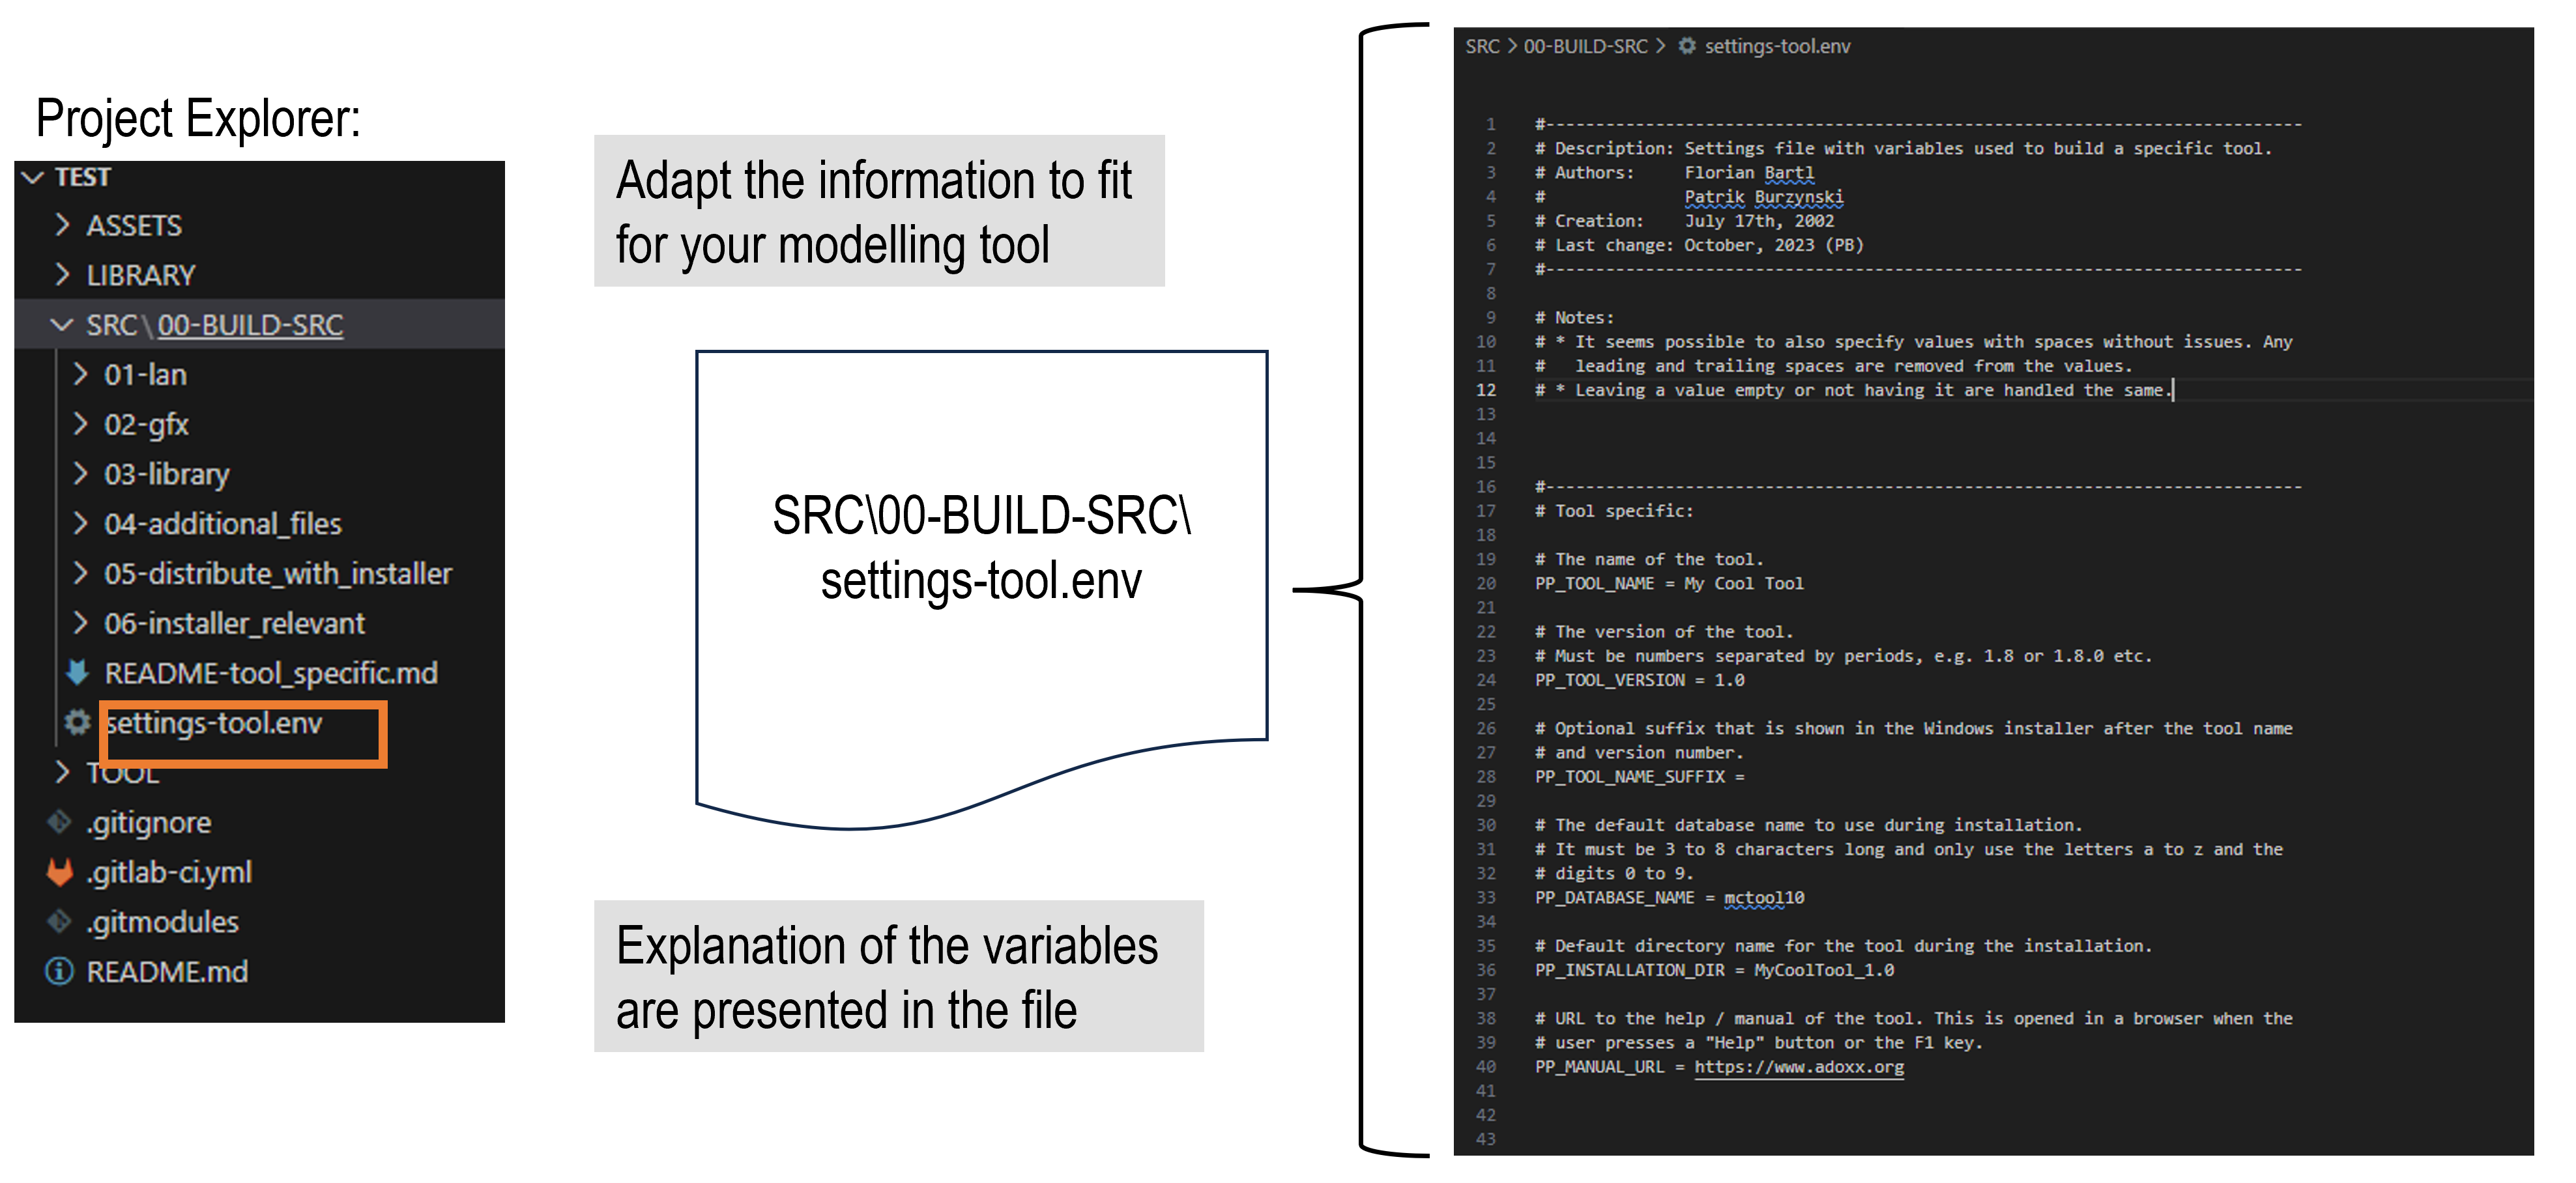 Provide general tool information by adapting the settings-tool.env file
- Provide the logo and splash screen of your modelling tool
- Logos: overwrite the pictures in
SRC\00-BUILD-SRC\02-gfx\appicon\(.icns, .png and .ico are need for the different OS)- You can use for example Electron Icon Generator to generate the necessary icon files.
- IMPORTANT: when exporting the .ico you MUST NOT use compression for any of its individual icons.
- Splash screen: overwrite pictures in
SRC\00-BUILD-SRC\02-gfx\splash\- IMPORTANT: the .bmp files MUST be saved in 24-bit mode and without color space information, e.g. 24 bits (R8 B8 G8) in advanced options and "Do not write color space information" in compatibility options when exporting the .bmp in GIMP.
- Logos: overwrite the pictures in
![]() Overwrite the default logos and splash screen with the ones of your modelling tool
Overwrite the default logos and splash screen with the ones of your modelling tool
- Provide the ADOxx library (
.abl) and optional example models (.adl)- Save your files, created with ADOxx 1.8, in the
SRC\00-BUILD-SRC\03-libraryfolder - Name them
adostd.abl(ADOxx library) andadostd.adl(example models)- If you do not want to provide example models, delete the
SRC\00-BUILD-SRC\03-library\adostd.adlfile
- If you do not want to provide example models, delete the
- Save your files, created with ADOxx 1.8, in the
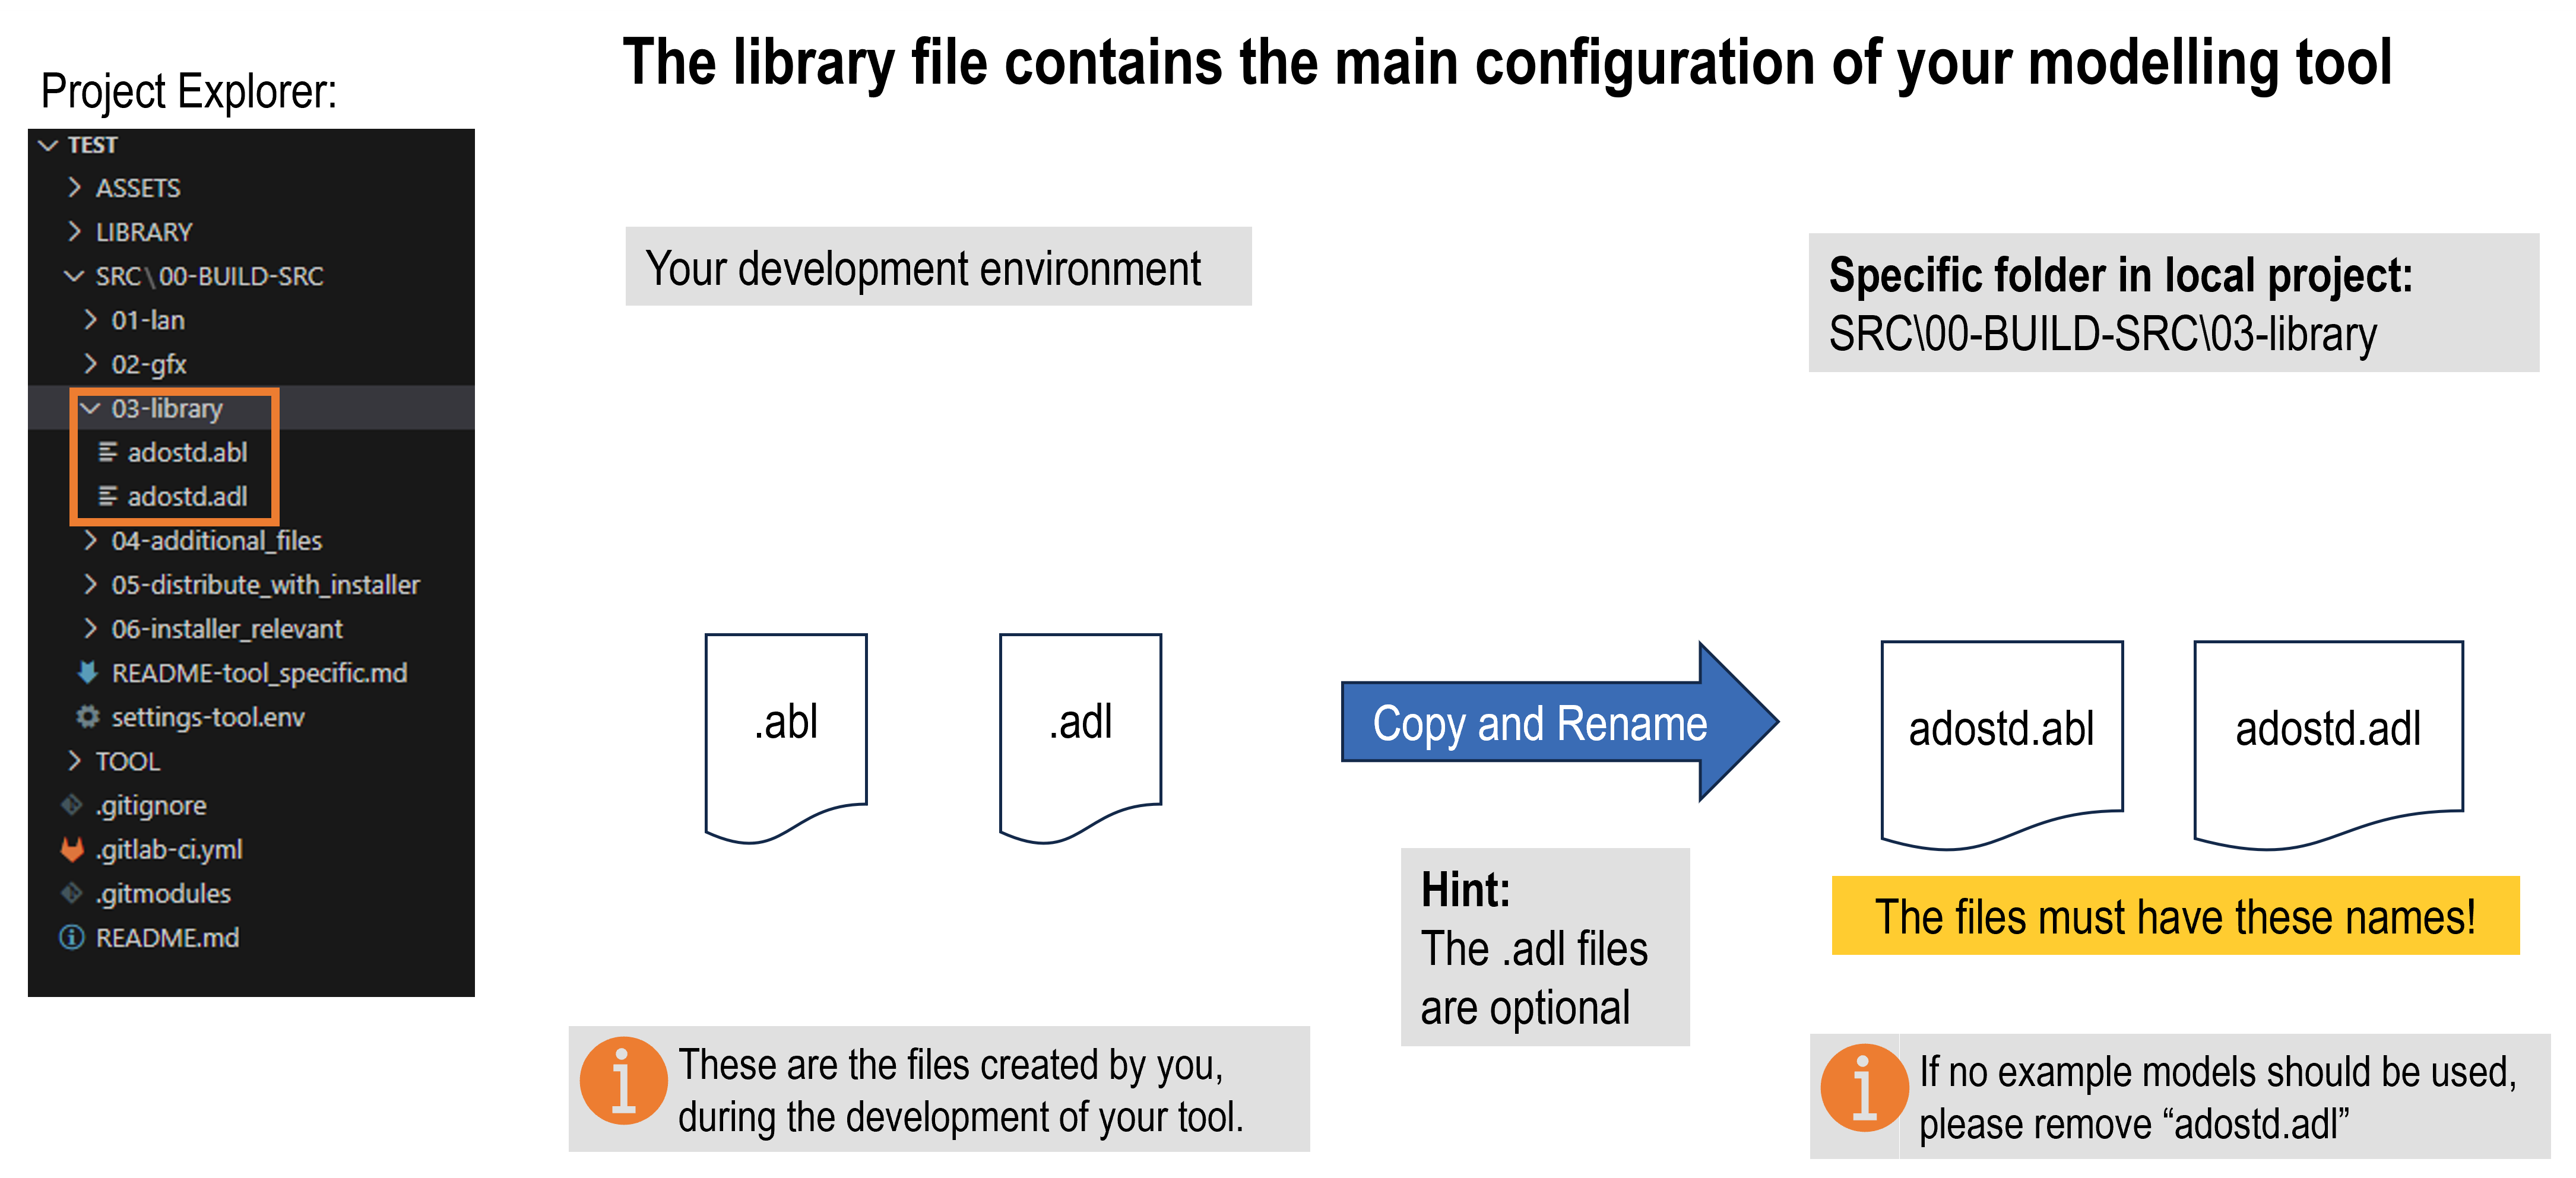 Replace the ADOxx library (.abl) and possible example models with your own
[optional]If your modelling tool needs additional files that should be packaged with it, you can add them to:SRC\00-BUILD-SRC\04-additional_files\for files that should be copied in the installation folderSRC\00-BUILD-SRC\05-distribute_with_installerfor files that should be distributed with the installer
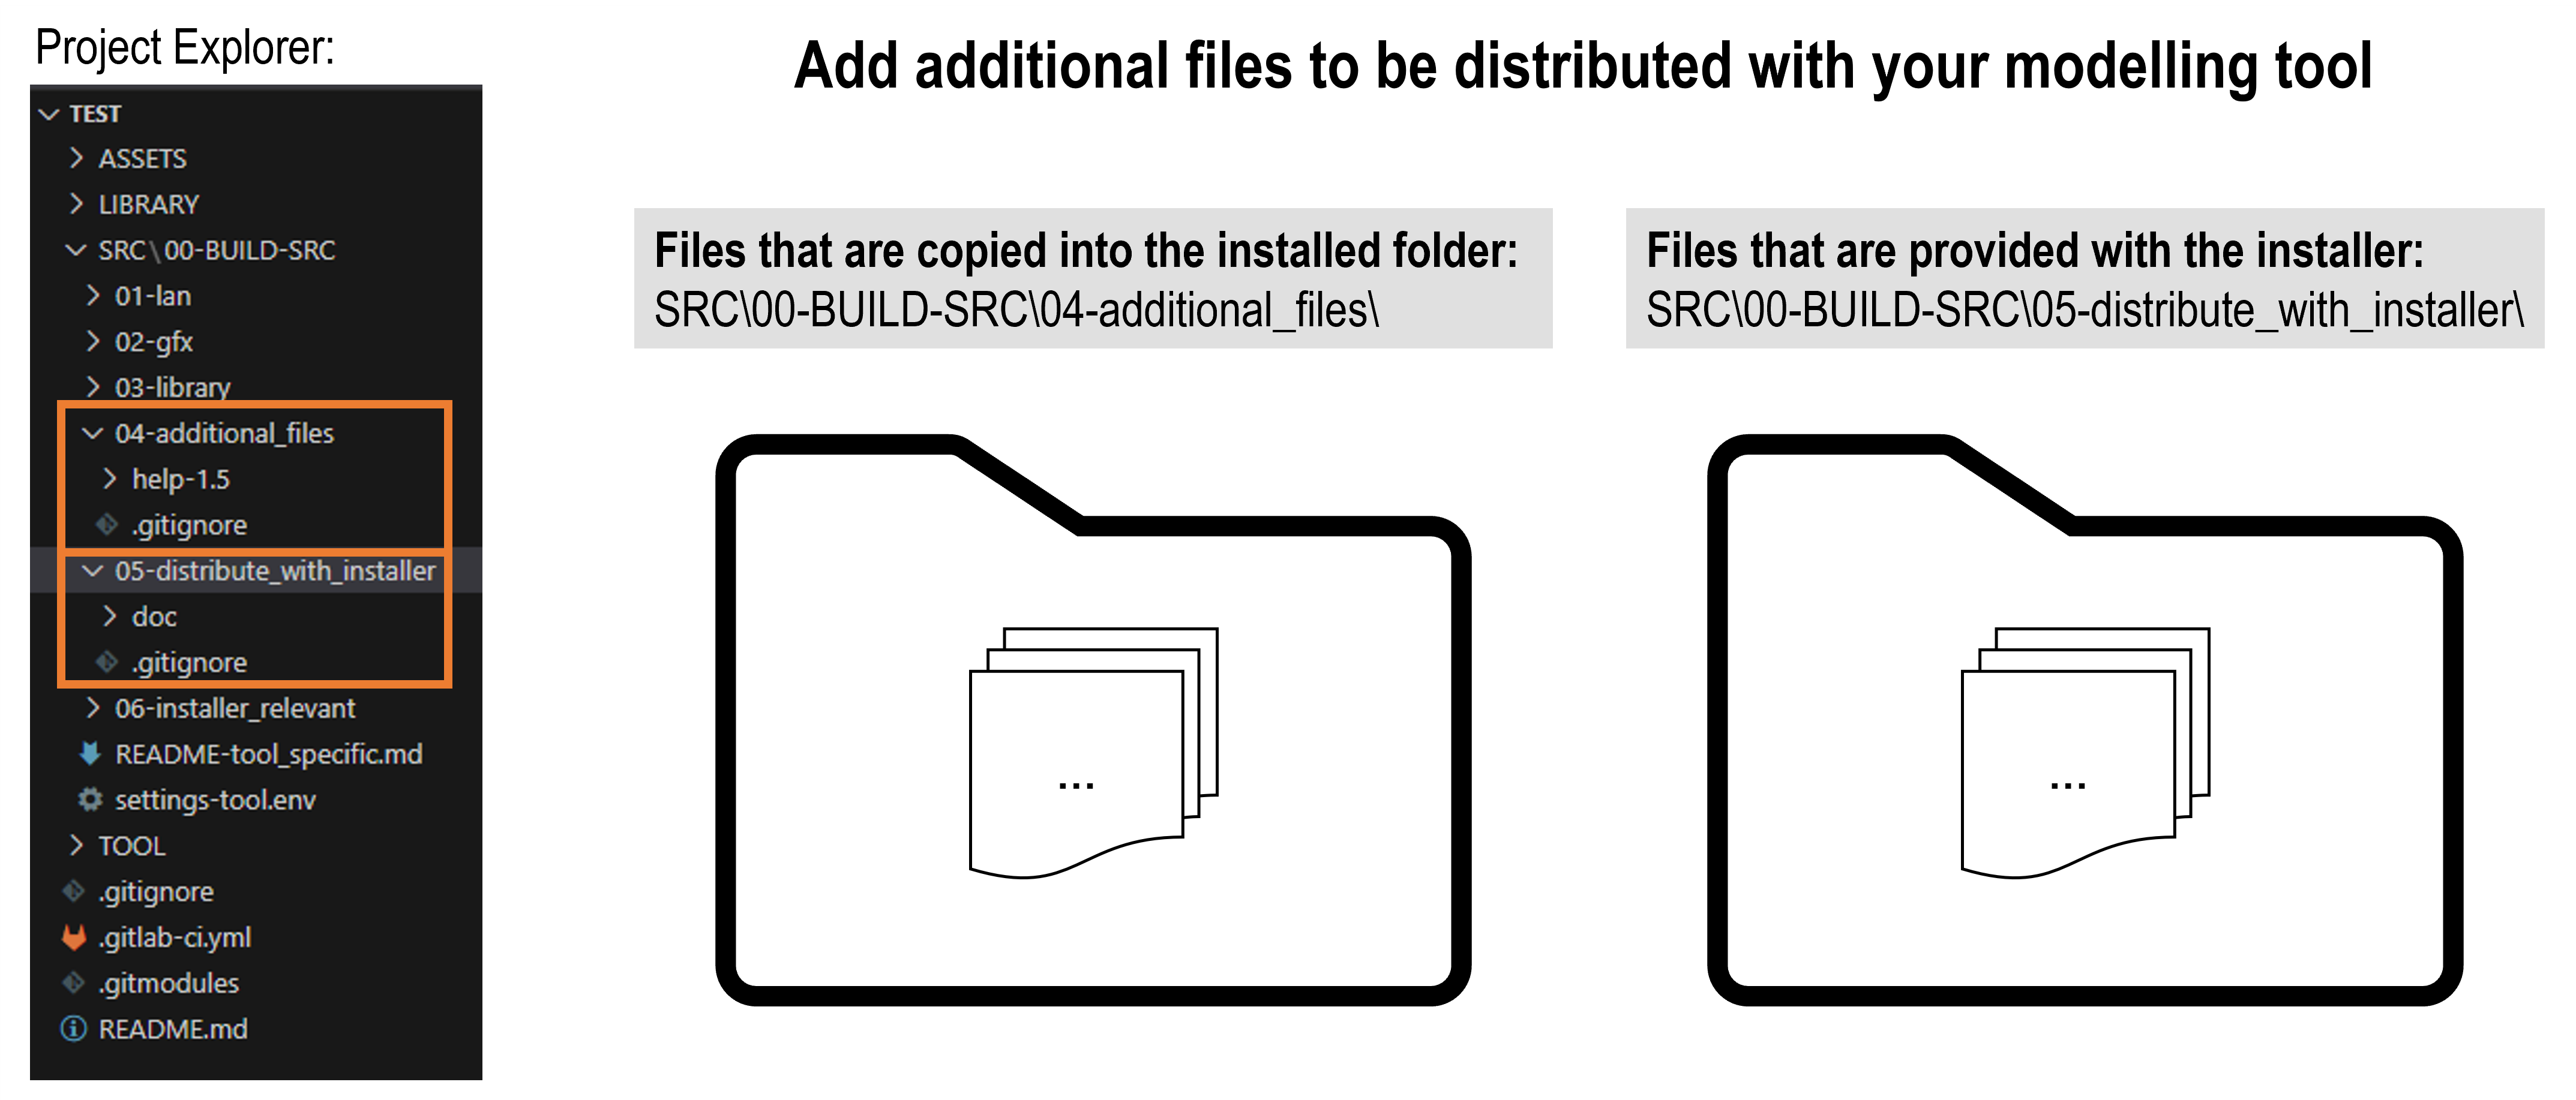 [optional] Provide additional files which must be packaged and installed with your modelling tool
- Trigger the packaging procedure
- The GitLab CI/CD pipeline must be triggered, so that the installation files are build.
- This is only possible if a file in
SRC\00-BUILD-SRCis changed and then pushed.
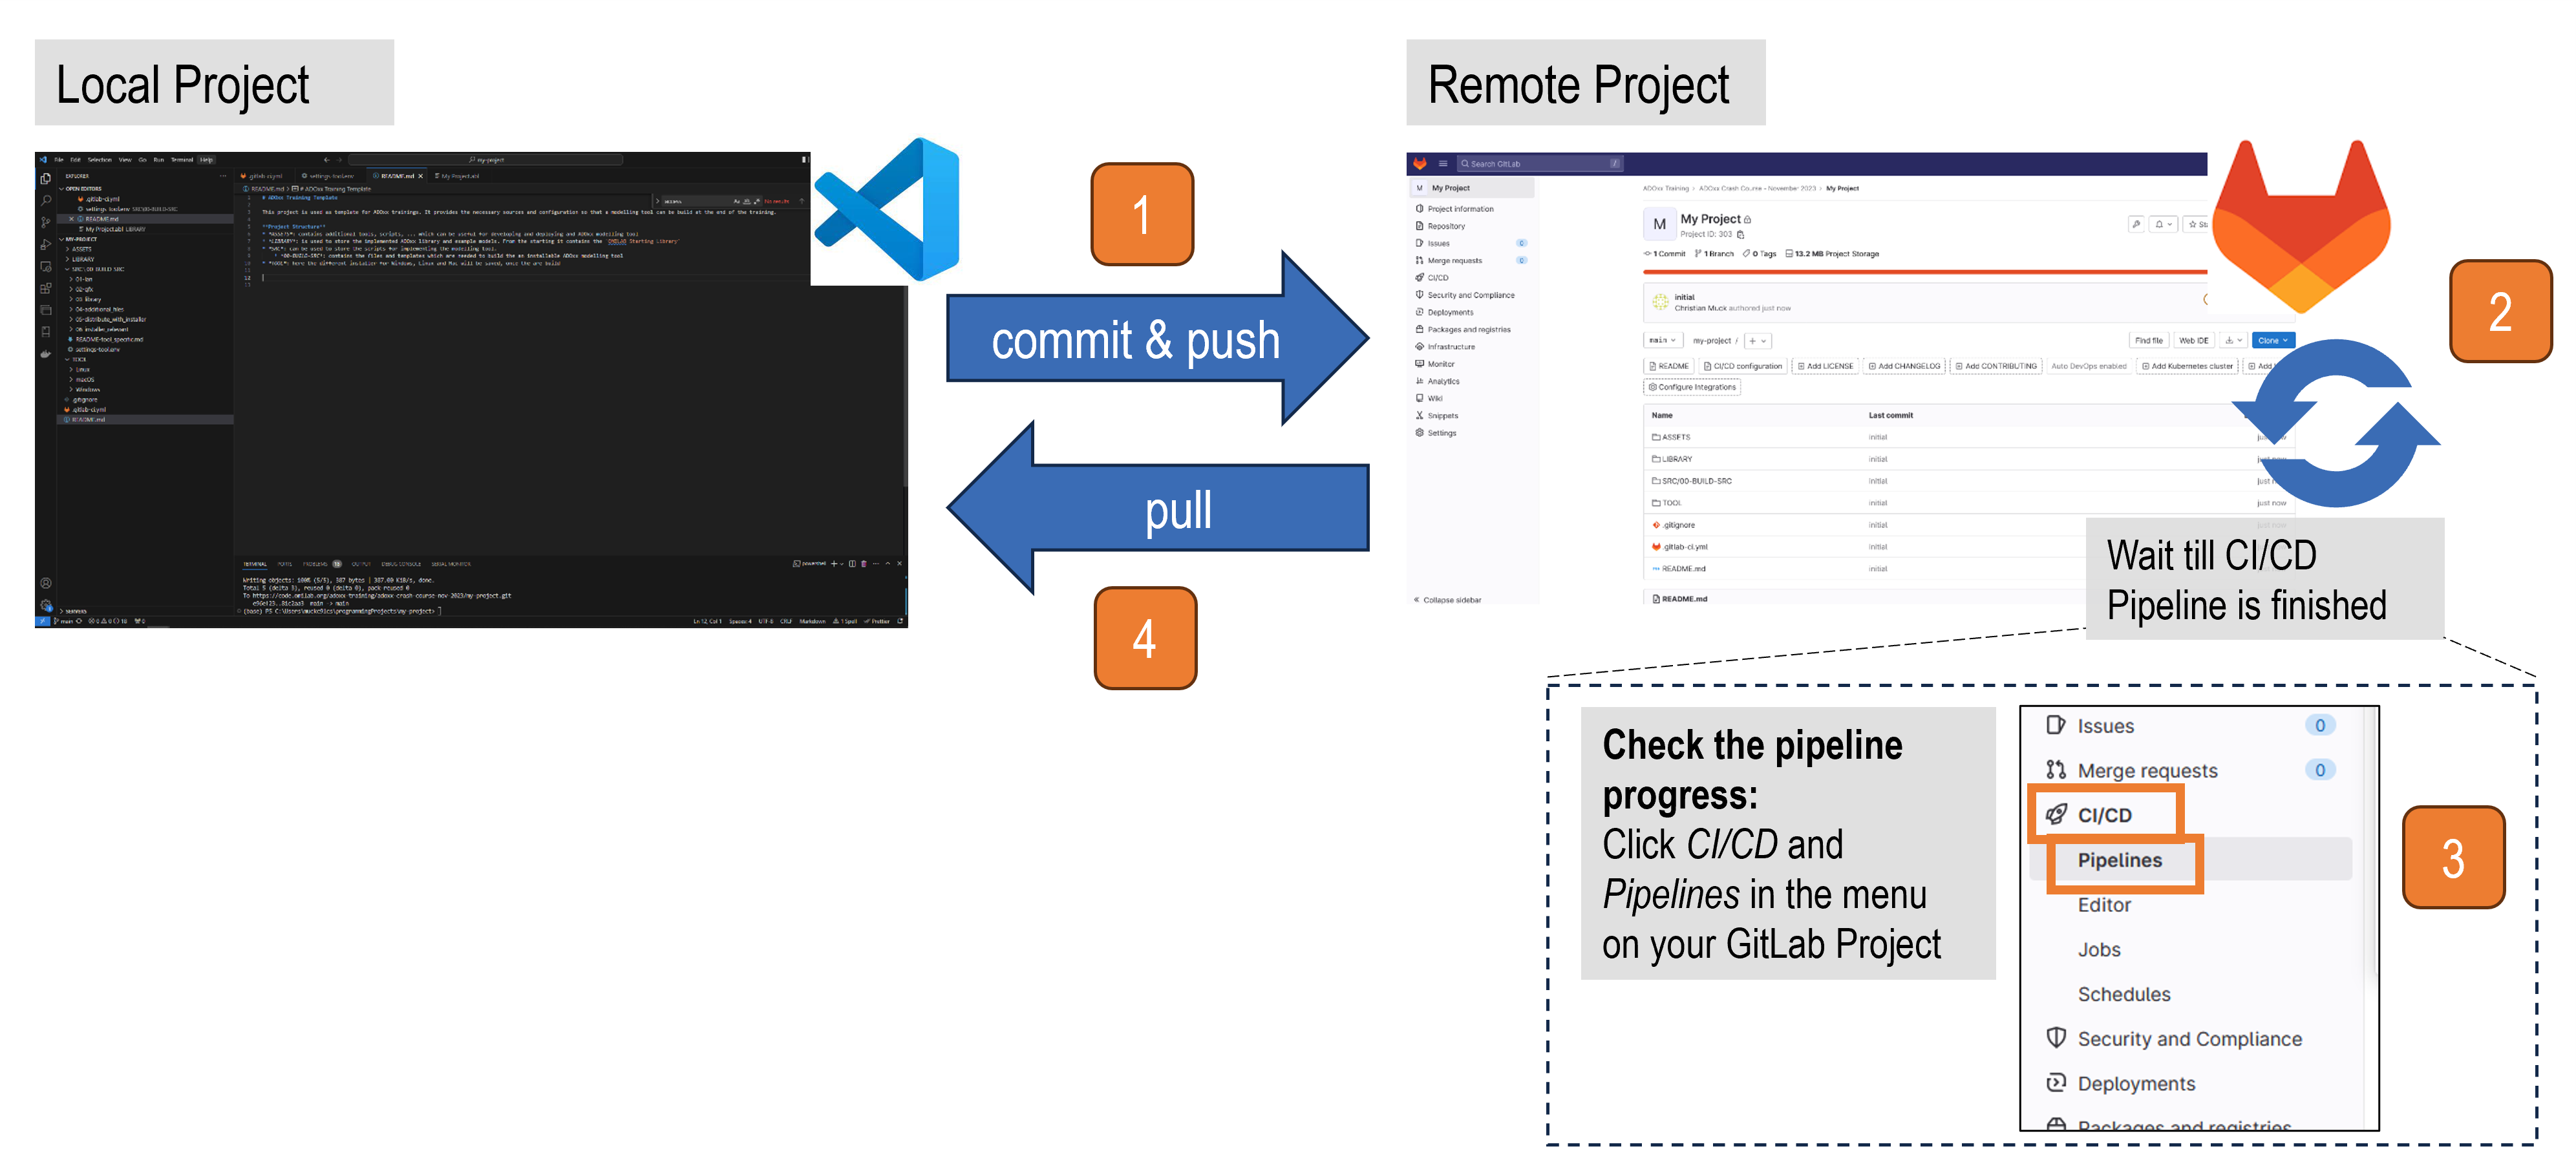 Visualisation of the general packaging procedure
- Open
Source Controlwindow (in Visual Studio Code) - Hover your mouse over the
Changesline
2a. Click on the appearing+symbol (to make agit add *of all the changed files)
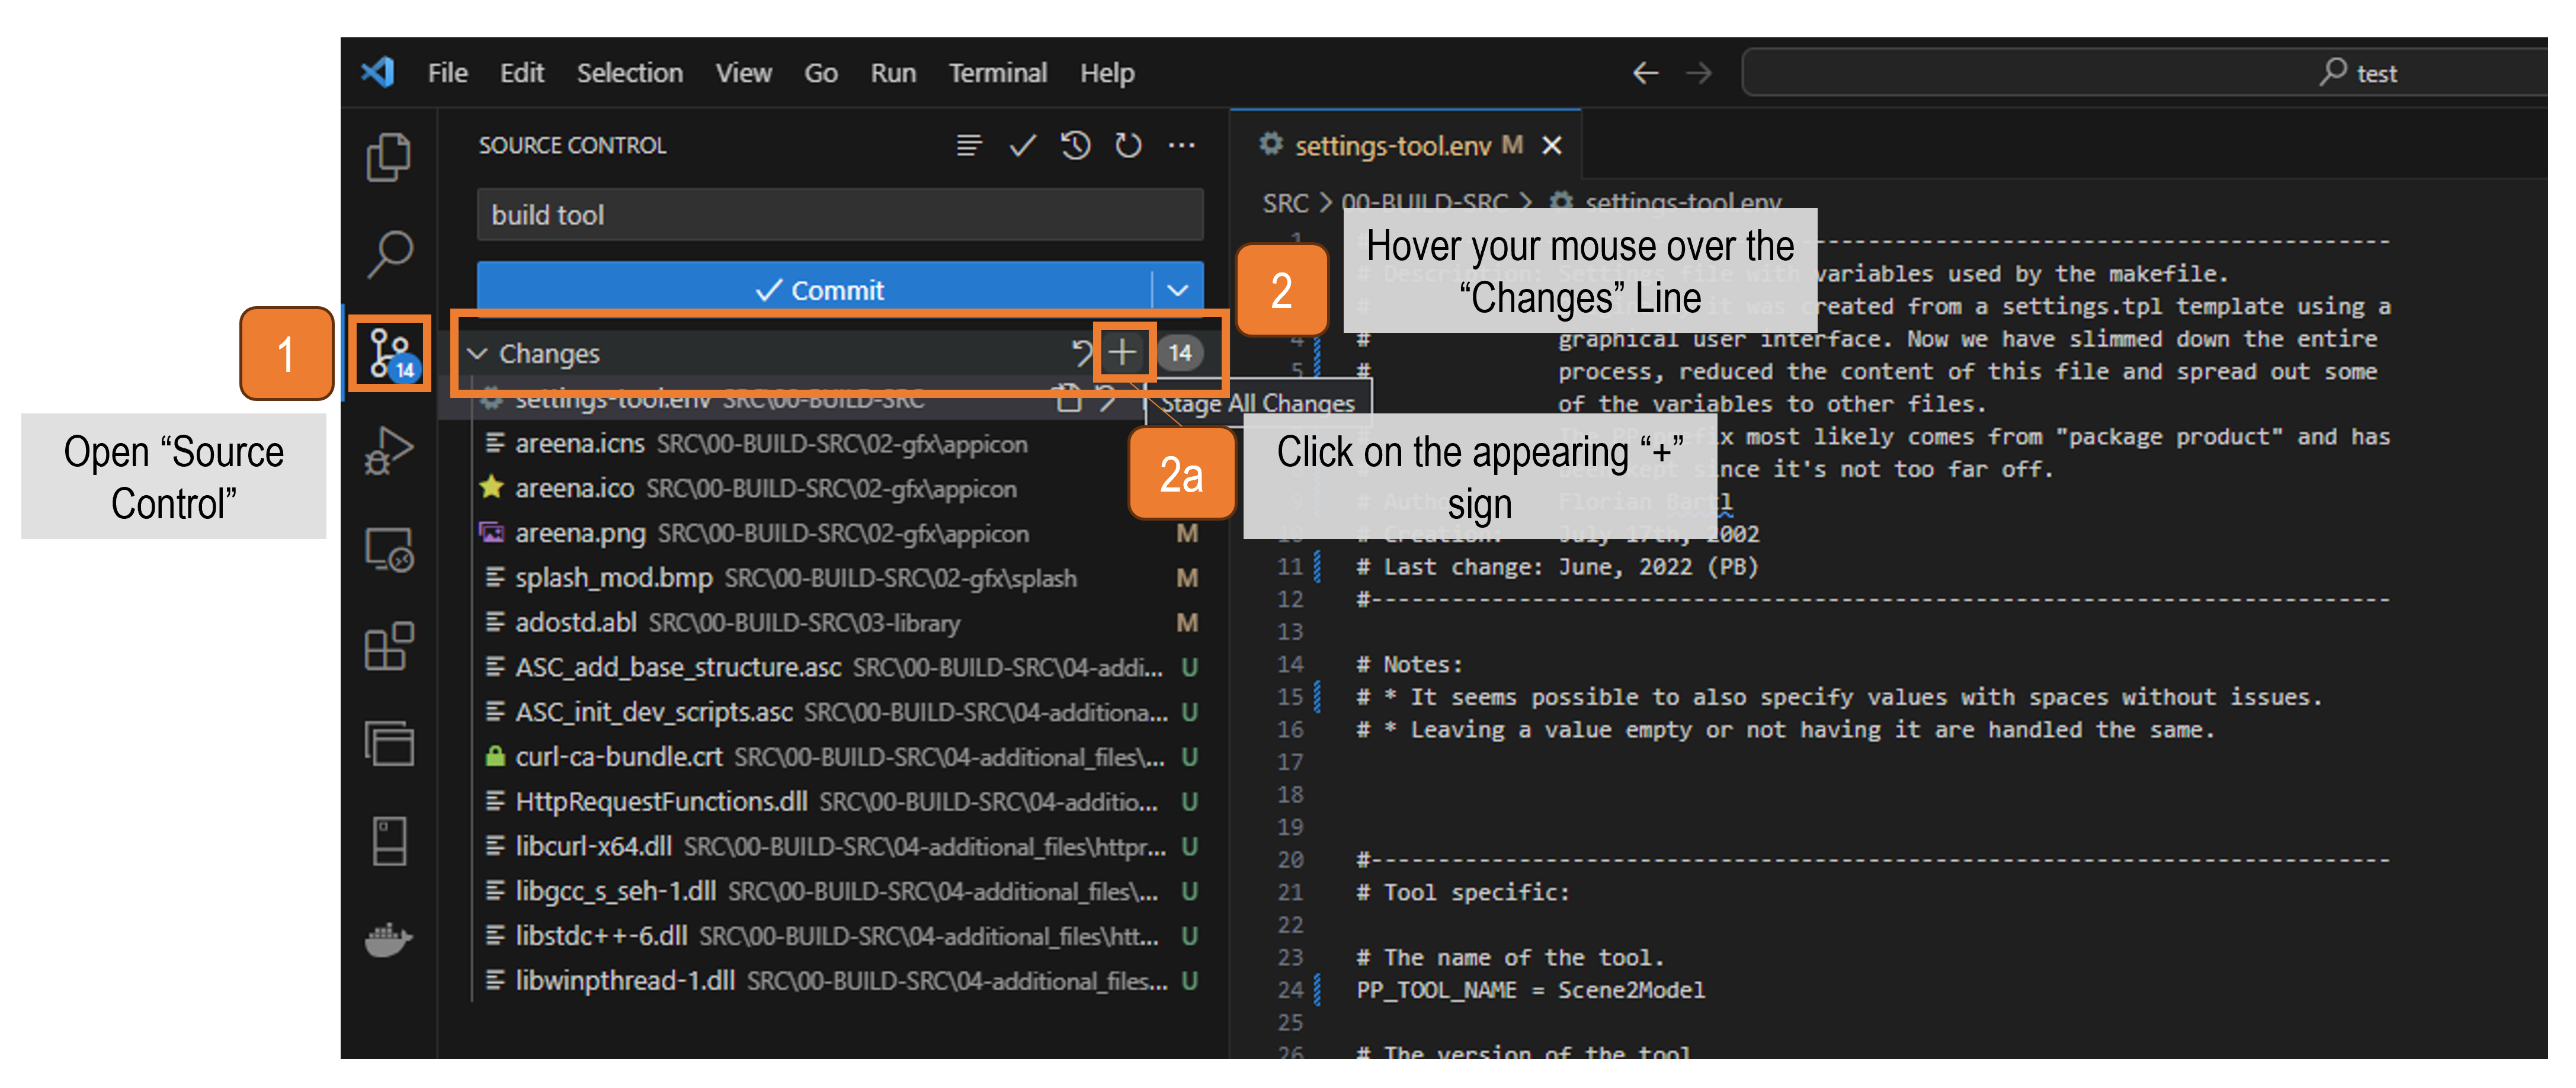 Add your changed files to prepare them for upload on your GitLab repository (equal to
 git add * command)
- Add a short description in the text field above the
Commitbutton, like package <modelling-tool-name> (= provide git commit name) - Click the drop-down menu arrow next to the
Commitbutton - Click
Commit & Push
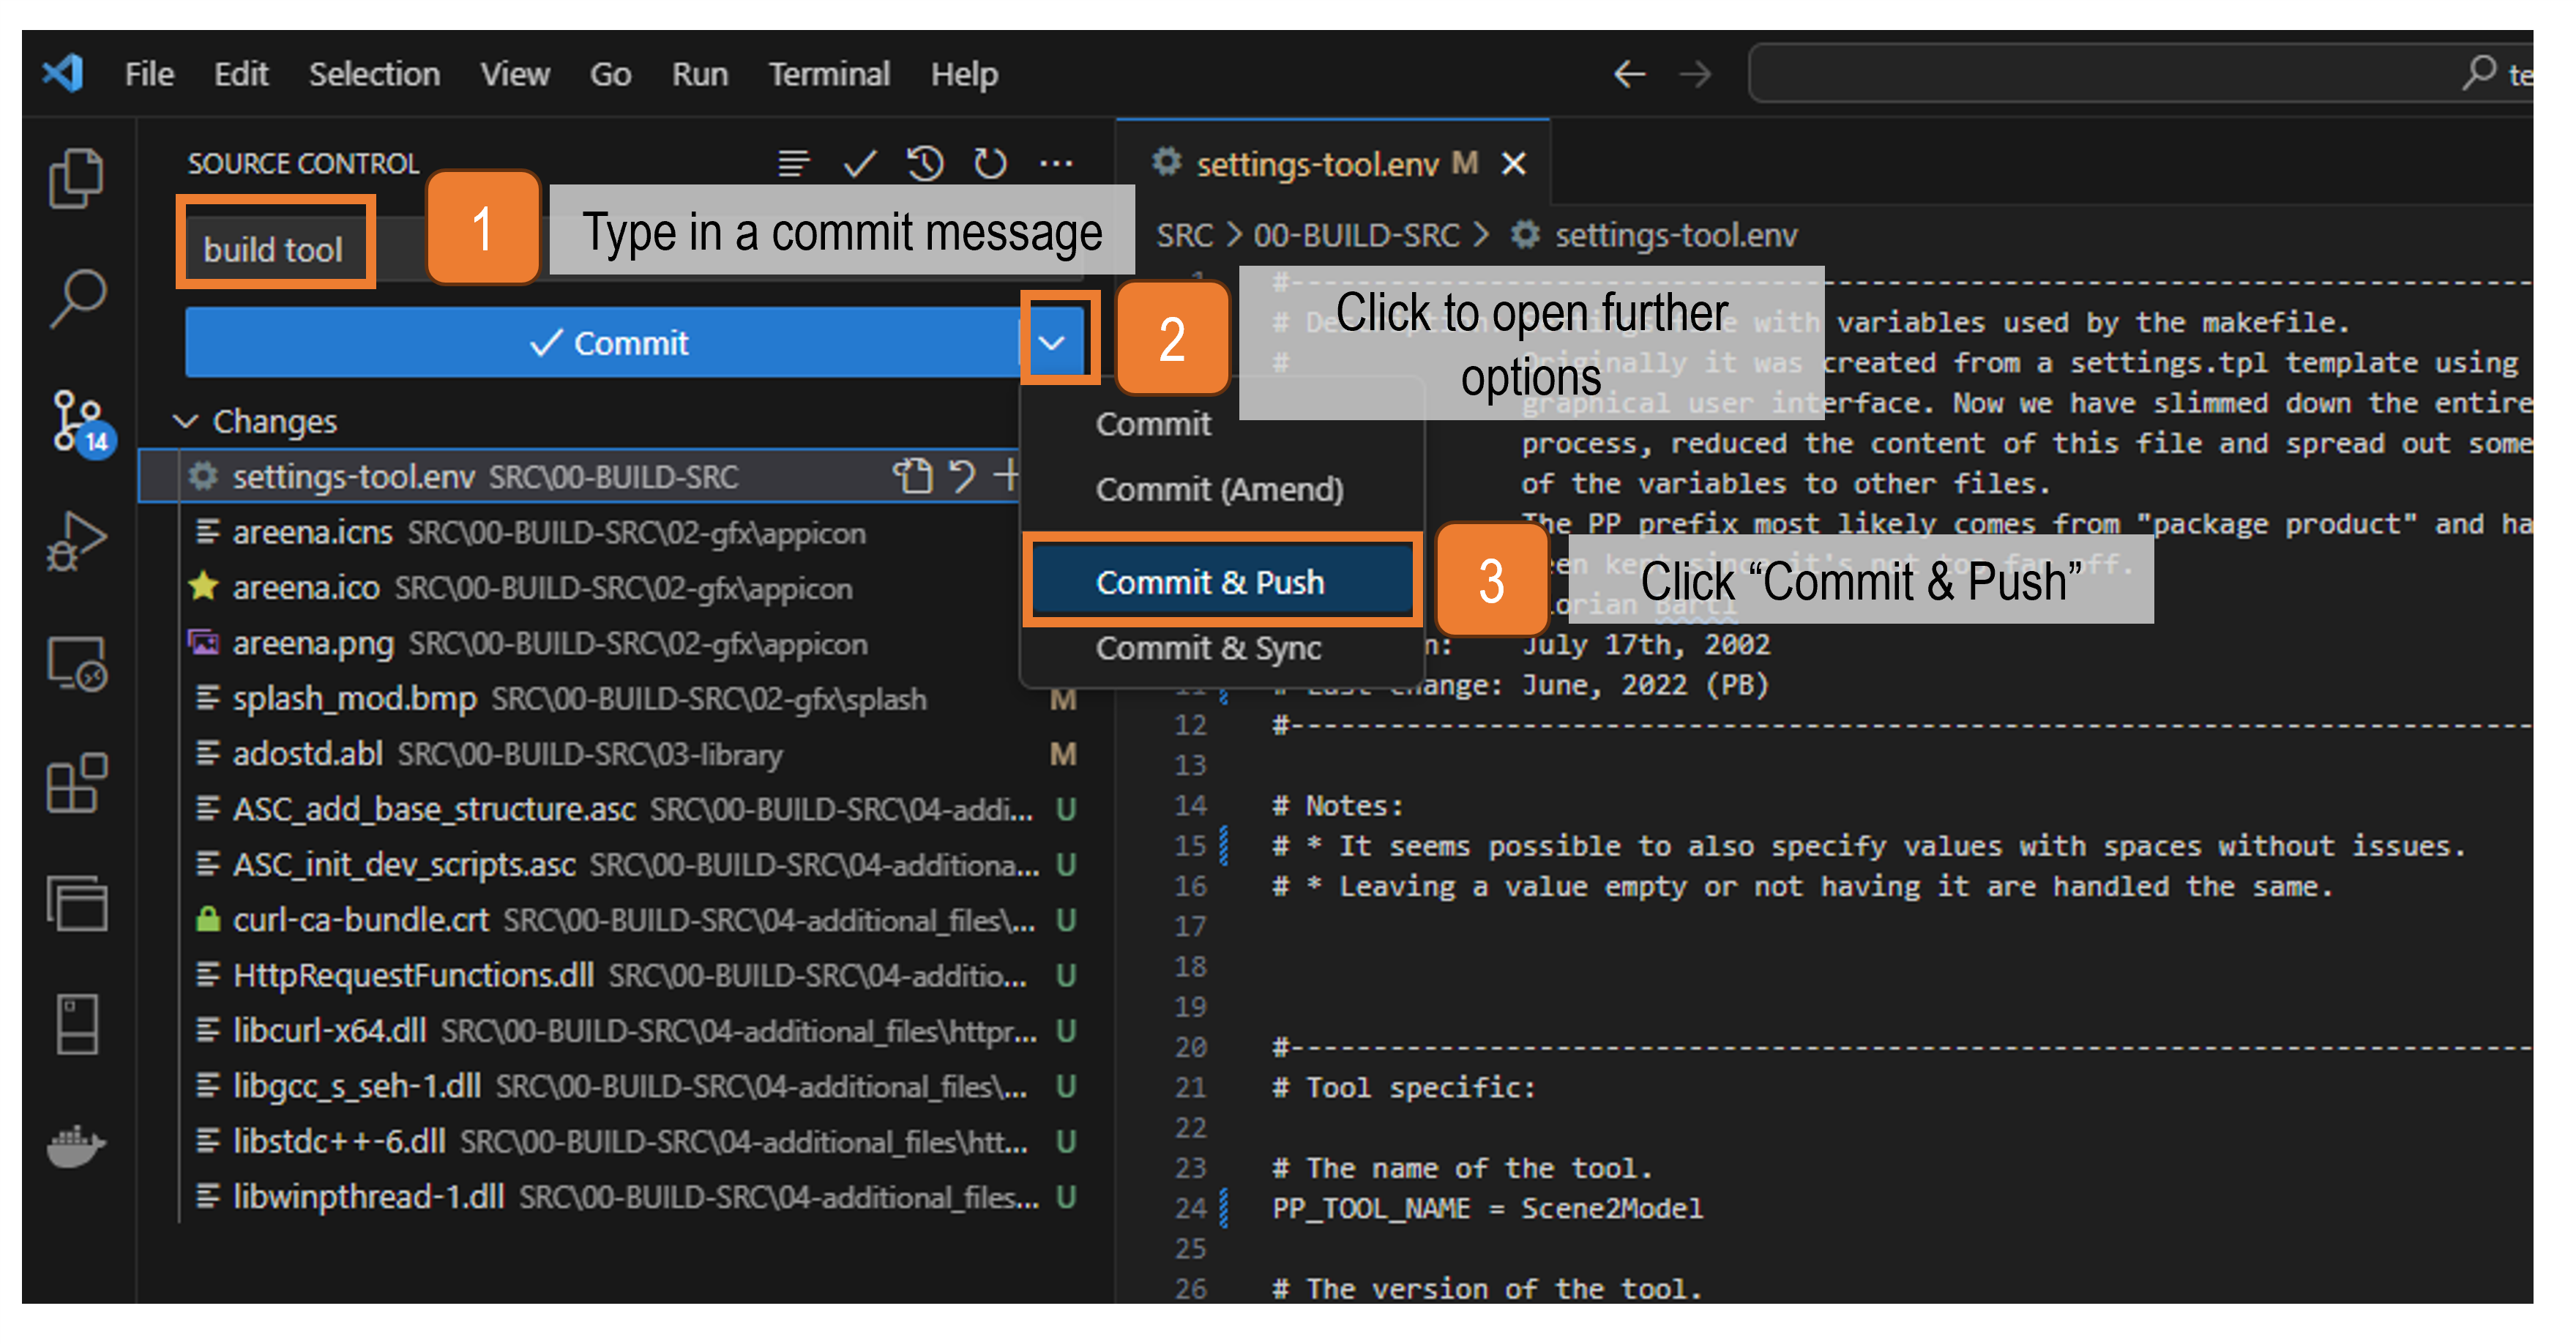 Commit & Push your changes to trigger the packaging of your modelling tool
- Wait till your tool is packaged
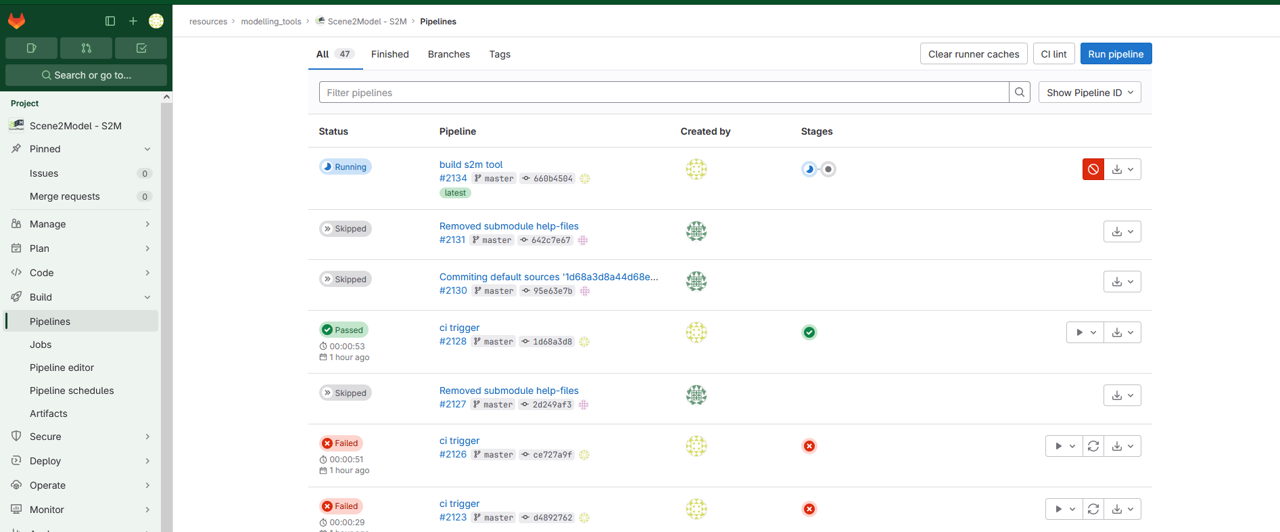 Check the progress of your modelling tool packaging
- Open
Source Controlwindow (in Visual Studio Code) - Click on the three dots
...to open theViews and More actions...drop-down menu - Click
Pull
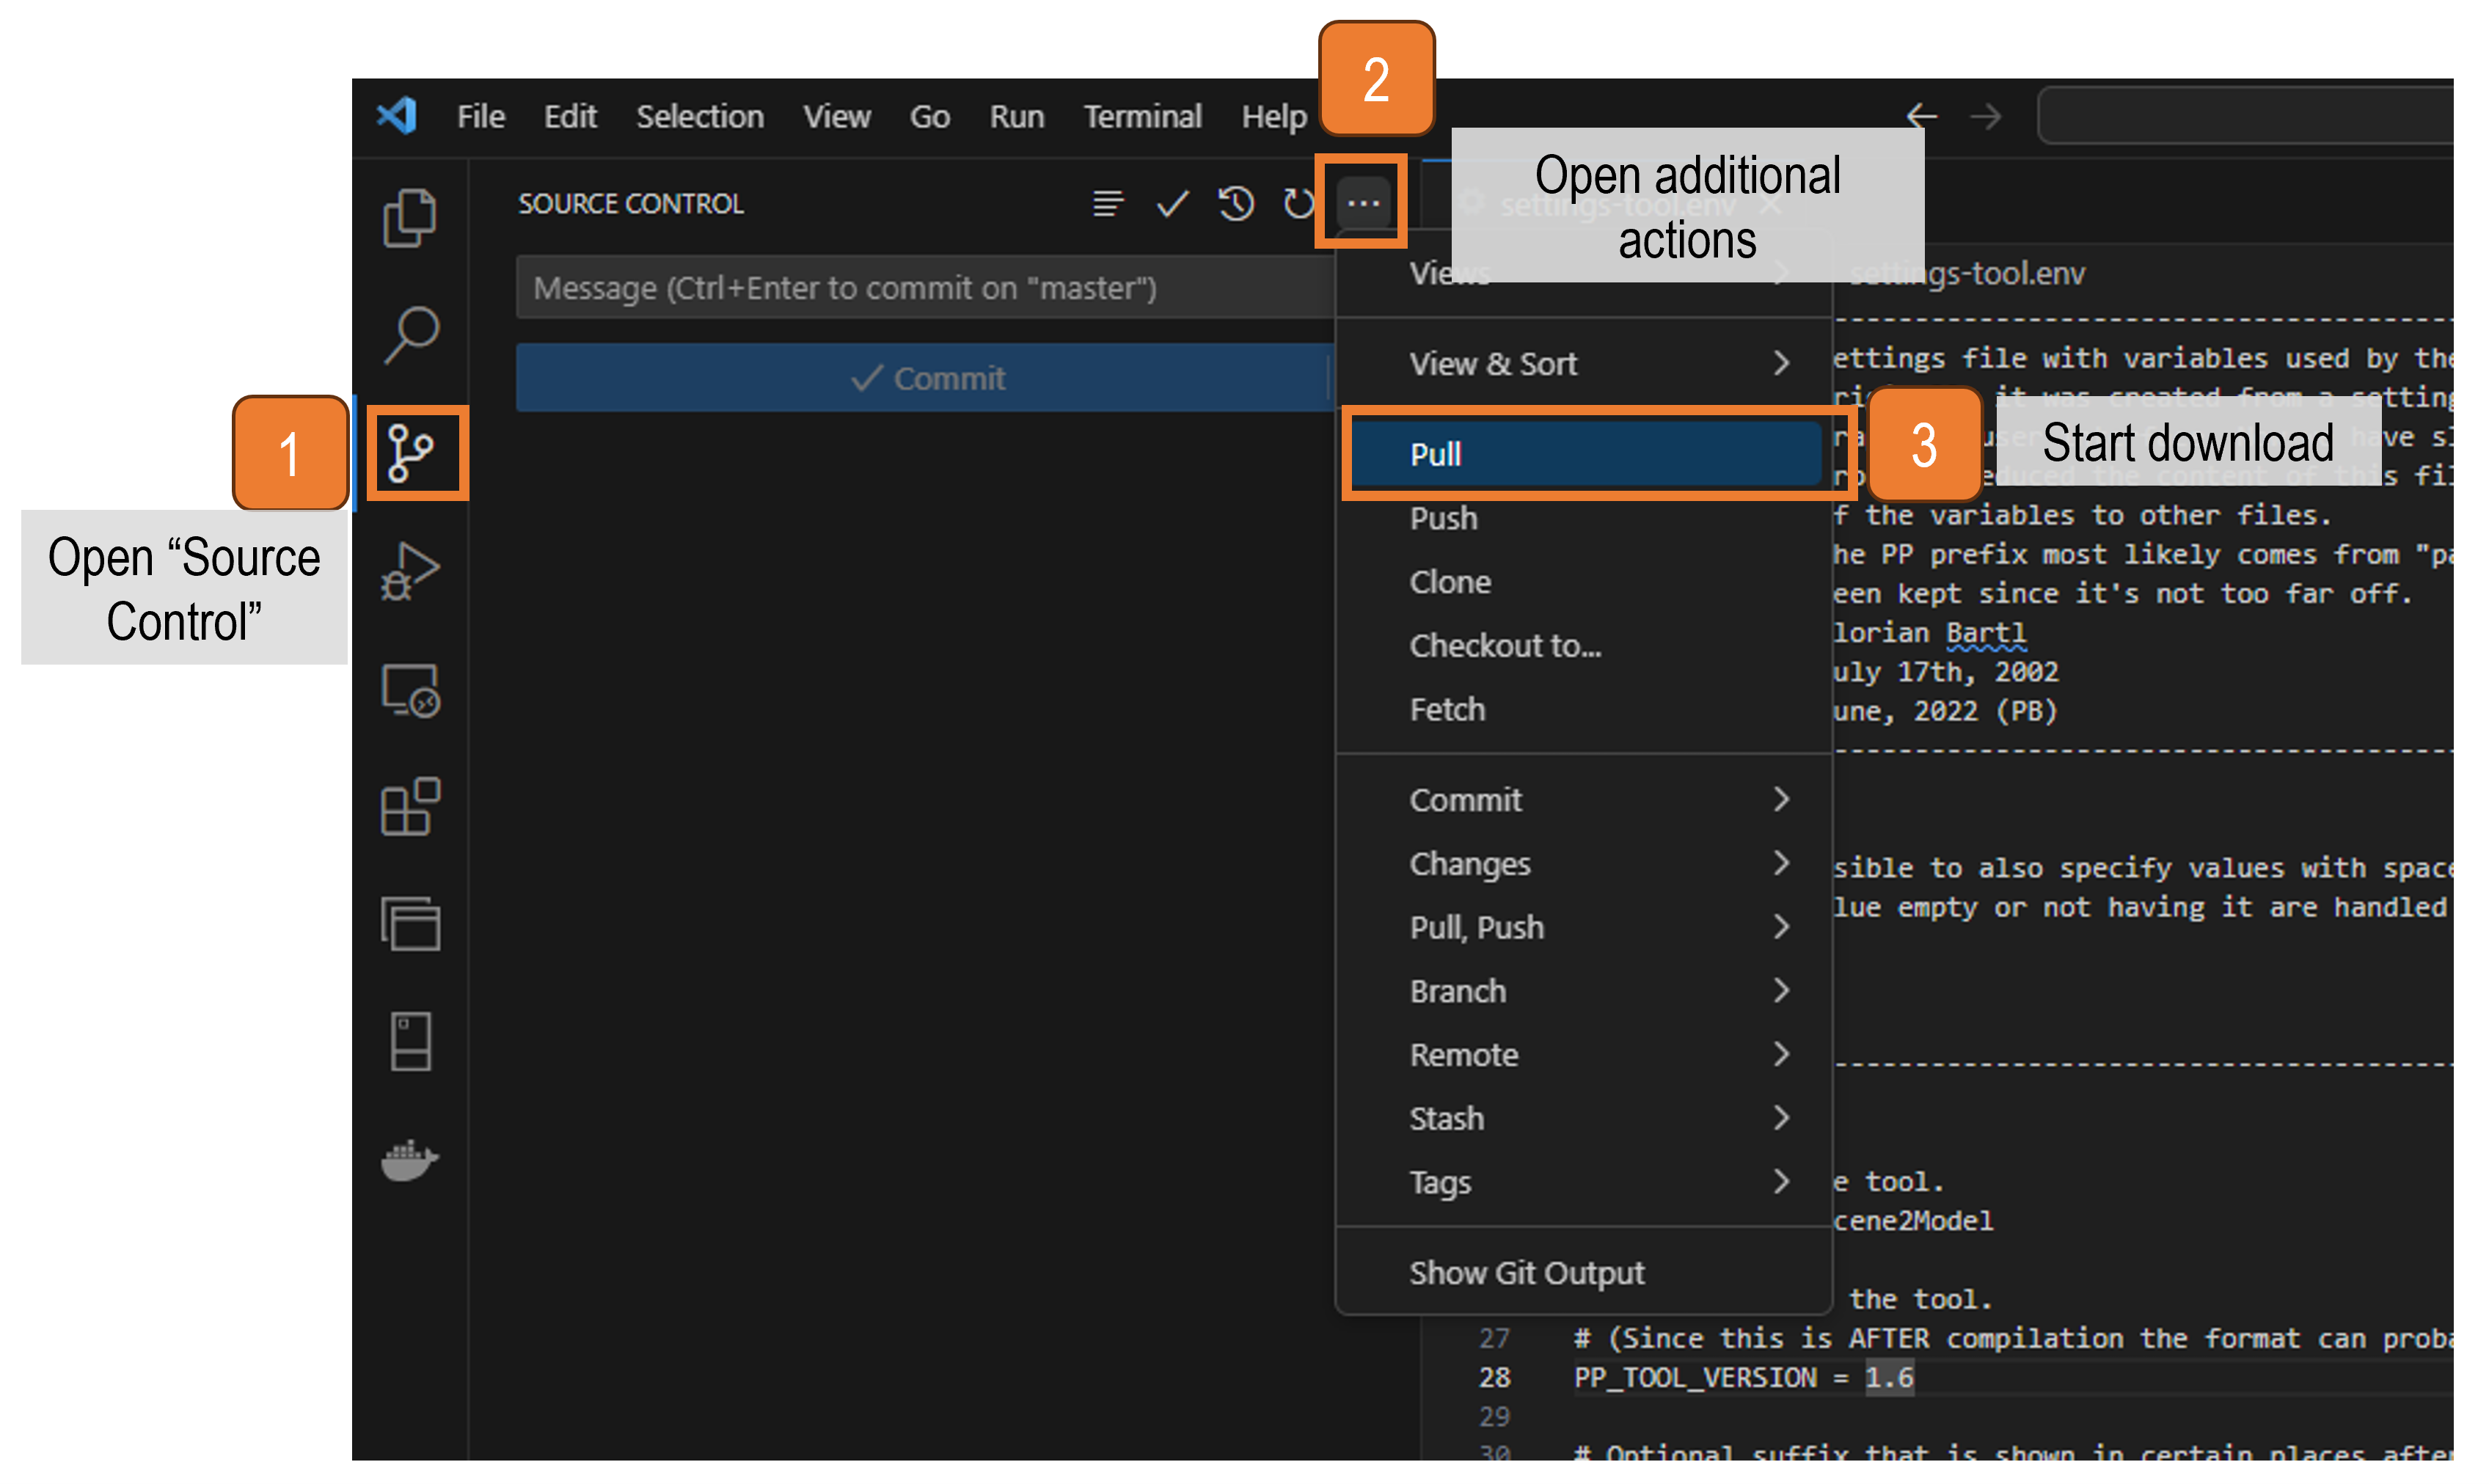 Get the packaged installation files for your modelling tool locally
- The installation files are now available locally and in your GitLab project
- Open the
Explorerwindow (in Visual Studio Code) - Under
TOOLyou find three folders, with the installation files for the different operating systems
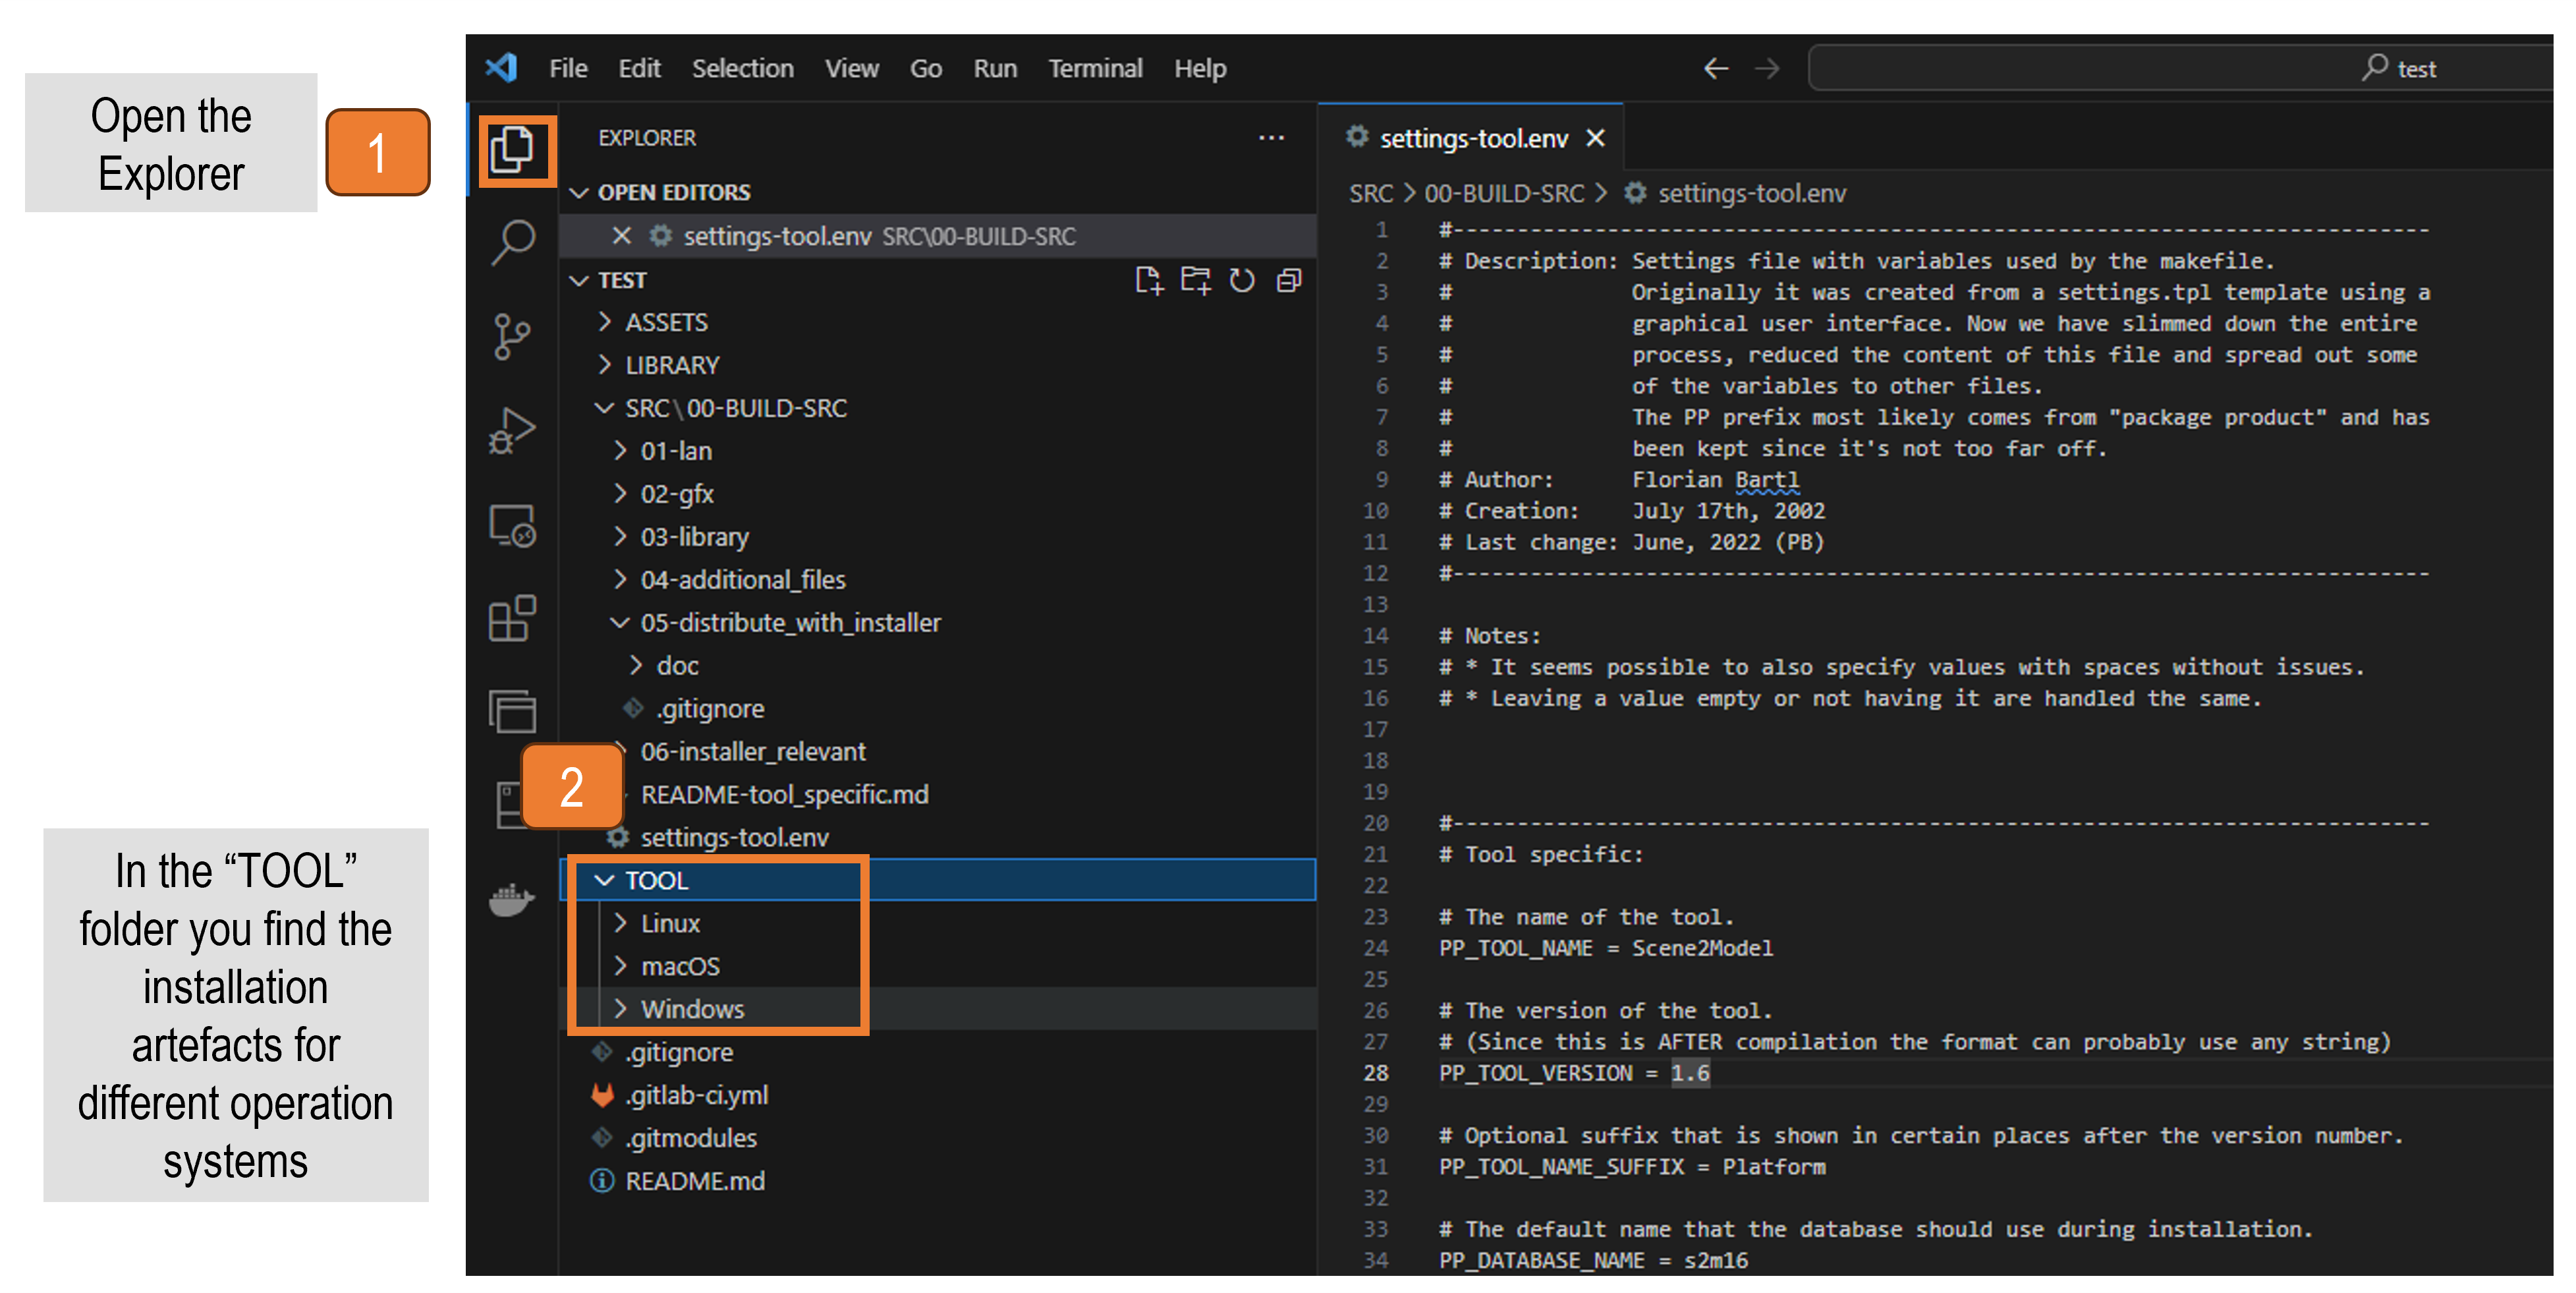 Find the packaged installation files for your modelling tool locally
 Find the packaged installation files for your modelling tool on GitLab