Example of definition of a pre-defined query
This example shows the recommendations of how to define a predefined query. In our example a "Predefined query on dynamic models", which allows the ADOxx user to display all activities with waiting time grater than the time given by the user will be added.
Add query
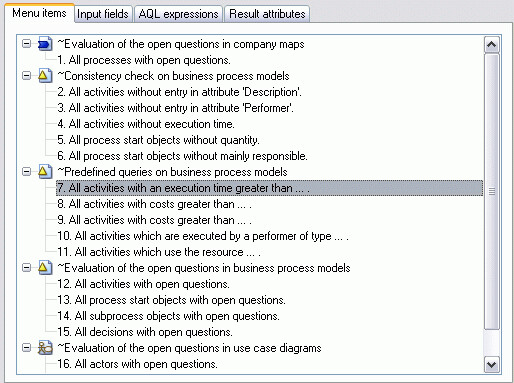
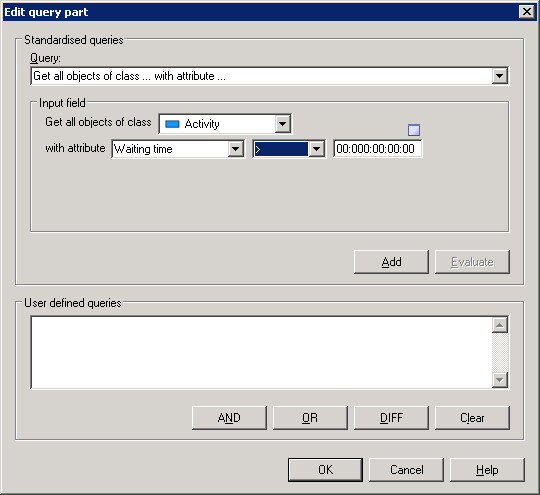
Select in the window "<Library name> - edit queries" the already defined one "Display all activities with resting time greater than...".
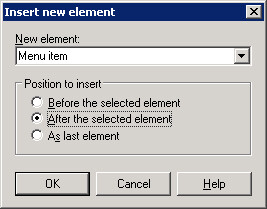
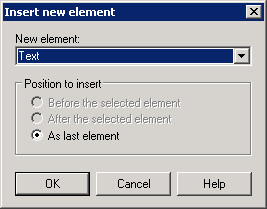
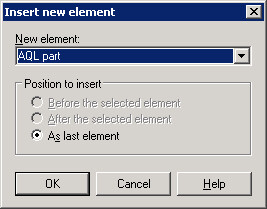
Open the context menu (with the right mouse button) and choose menu option "New". In the window "Insert new element" the user can define where the query should be inserted (e.g. "After the selected element").
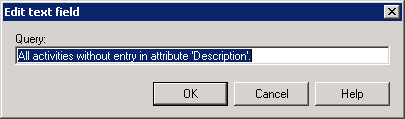
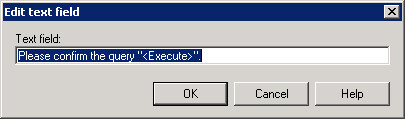
In the window "Edit text field" enter text for the new query.
The new query will be created. Select the new query to define edit fields, AQL expressions and result attributes.

To define input fields
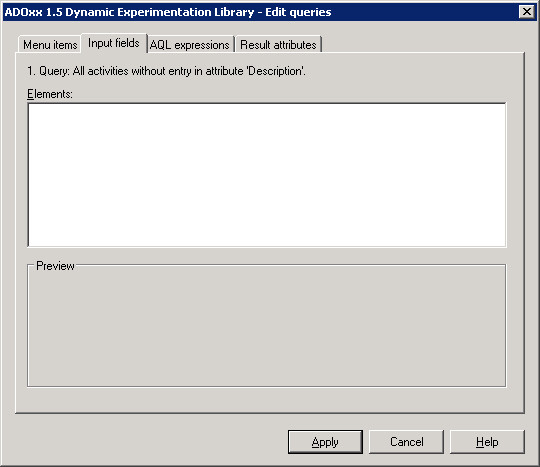
Please go to the tab "Input fields", where the text for the selected (new) query will be shown (inclusive ordering number).
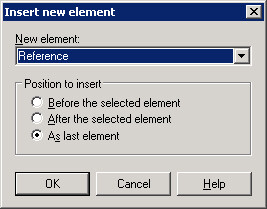
Click with the right mouse button on the field "Elements" and choose from the context menu the option "New". As a result, in the window "Insert new element" you should choose "Text" as a new element and define its "Position to insert".

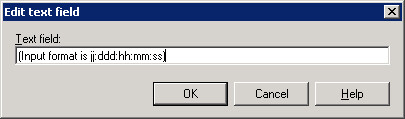
In window "Edit text field" give the first element, i.e. the first part of the query,.
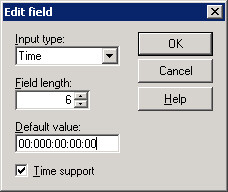
Click with the right mouse button on the field "Elements" and choose from the context menu the option "New". As a result, in the window "Insert new element" you should choose "Input field" as a new element and define its "Position to insert".
In the window "Edit field" please define input type "Time" and the field length "60". In the field "Default value" enter the value "00:000:00:00:00" (zero in ADOxx time format) and activate the option "Time support".
Click with the right mouse button on the field "Elements" and choose from the context menu the option "New". As a result, in the window "Insert new element" you should choose "Text" as a new element and define its "Position to insert".
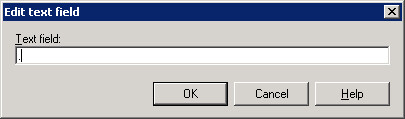
In the window "Edit text field" enter the text of the third element.
Click with the right mouse button on the field "Elements" and choose from the context menu the option "New". As a result, in the window "Insert new element" you should choose "Text" as a new element and define its "Position to insert".
In window "Edit text field" enter the text for the fourth element.
The query is shown in the field Preview in the way it is displayed to the ADOxx user.
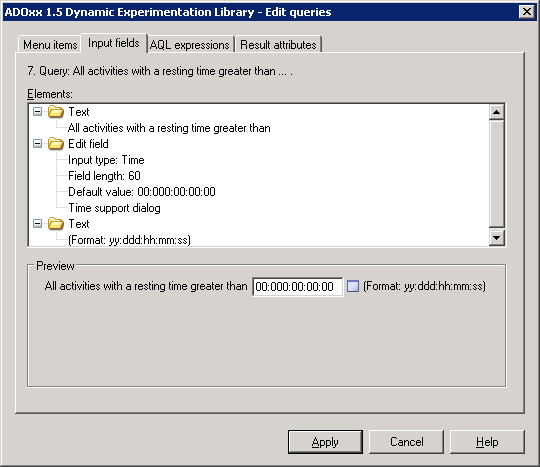 Due to the active option "Time support", the input field for entering the time is followed by the button
  , which calls a support window.
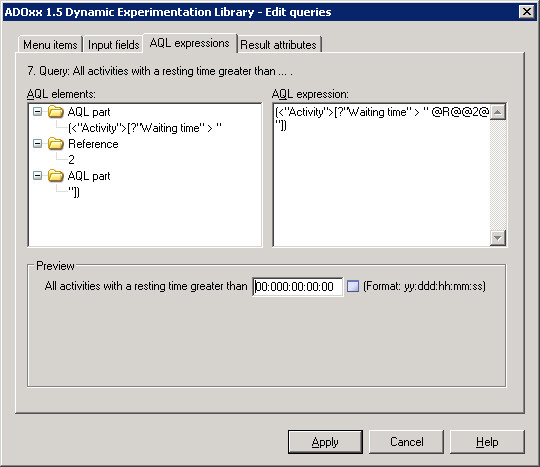
To define AQL expressions
Change the text of the query in the "AQL expression" tab, so that it is the same as seen in the preview.
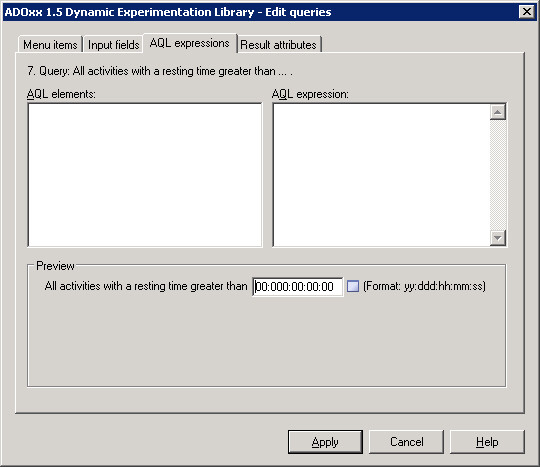
Click with the right mouse button on the field "AQL elements" and choose from the context menu the option "New". Then choose in the window "Insert new element" the new "AQL part" to be inserted. The position to insert is set in advance.
In the window "Edit part of a query" you can define a query, which allows you to choose the standard query "All objects of a class... with an attribute ..." and input data into input field, i.e. class "activity", attribute "waiting time", logical operator ">" and time value "00:000:00:00:00".
 Finally, click on the OK button, to turn the defined query into the AQL syntax.
Select the created element "AQL part", open the context menu (with the right mouse button) and choose the option "New". In the window "Add new element" select "Reference" as a new element. In this case, the insert position is irrelevant.
In the window "AQL - create reference" the AQL expression will be displayed.
 Click on the button "Suggestion" (if necessary many times one after another), to highlight the position of the reference (for example time giving "00:000:00:00:00"), and then click on the button "Create".
In the window "AQL elements" the previously entered AQL expression is divided and widened with the second reference to the second input element. The correct AQL expression is shown in the window "AQL expression".
To define result attributes
Please change in the tab "result attributes" the text of the query, so that it is the same as during preview
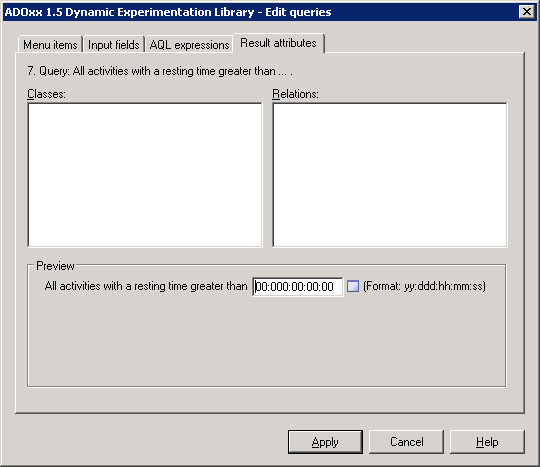
Click with the right mouse button on the field "Classes" and choose from the context menu the option "New". In the window "Insert new element" select "Attribute" as a new element. In this case, the insert position is irrelevant.

The attributes available to choose will be seen in the "Attribute Selection" window.
 The structuring of the attribute selection is as follows: * Model type of an application library
* Classes of the model type

* Notebook chapter of a class

* Attribute of the chapter in the notebook
e.g. choose the attribute "waiting time" in the model type "Dynamic model", in the class "Activity", in the chapter "Time/costs".
- The attribute "Waiting time" will be displayed in the window "Classes" (as well as a class and model type) .
